


| This guide explains how to make a 3D animation video step by step, covering the full 3D animation process from concept and storyboarding to modeling, animation, lighting, rendering, and final delivery. It breaks down how 3D animation works, the role of a 3D animation maker, and how professionals create everything from 3D cartoon animation to product and marketing videos. If you want to create a 3D animation video or understand how 3D videos are made end to end, these 12 steps show the complete workflow. |
Before we take a look at how you can create a 3D animation video from scratch...
Check out our compilation of the Best Animated B2B Infographics Explainer Videos here:
Now let's get back to our topic at hand.
Have you ever been awed by a 3D animation movie, video, or B2B campaign?
I know I have!
Some have made me gasp and think, “Wow, that was amazing! I wish I could create something like that!”
The immediate question that follows this urge is — “How?”
We're here to ignite that creative spark within you and get you all the information you need to get started with this guide on how to make 3D animation videos in just 12 easy steps.
So, buckle up, and let’s get to it!
Whether you're a business looking to enhance your marketing strategy or an individual eager to explore a new creative skill, this guide is designed for you.
Watching 3D animation videos is easy and fun, but making one is a bit complex.
Its production has a lot of stages. Some early stages of 3D animation, like research and storyboarding, as well as later stages like voiceover and sound design, are similar to the 2d animation process.
But to make any 3D animation video, understanding all the other stages of the animation pipeline is very important.
Throughout this process, a video annotation service can provide valuable support by labeling scenes and adding notes at each step. This helps maintain organization, simplifies tracking of changes, and definitely saves time while minimizing confusion.
As one says—the journey of a thousand miles begins with a single step. So, let’s kick-start this journey of learning how to create 3D animation videos with the first step:

Picture Credit: Freepik
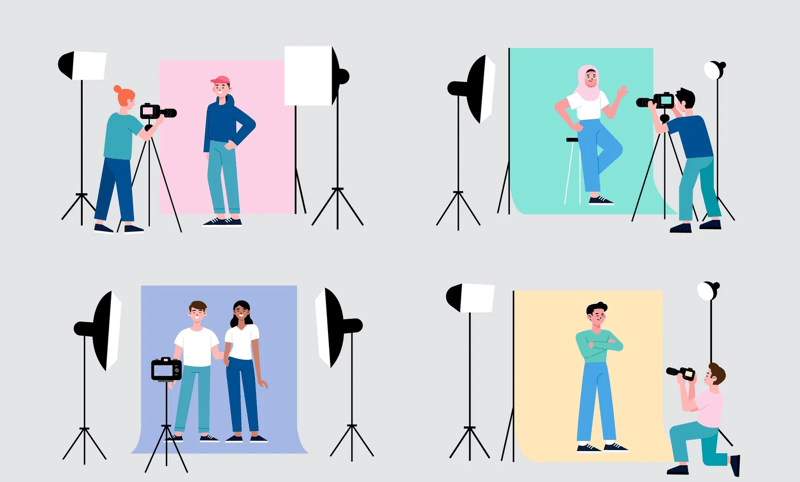
Before any 3D animation comes to life, its idea must first take shape.
For an independent project, the concept defines the storyline, characters, and setting.
For a business, the concept is to pinpoint who your target audience is and what your marketing message will be.
Companies like Pixar even spend over two years to get the script right before even moving with any sketches.
When I was reading about Pixar’s movie Coco, I was shocked to know that as soon as the team decided that the movie was taking place in Mexico, they decided to take a trip there.
They spent over three years just researching museums, markets, plazas, workshops, churches, haciendas, and cemeteries throughout Mexico.
This was done just to right their concept.
In contrast, the research and scripting for a marketing video are usually completed in less than a week.
Whether you're working on an individual project or a marketing 3D animation video, making changes to the story during the animation process can lead to a significant budget increase and potentially destroy your artistic or marketing project.
So, your concept must be firm before moving to...
Picture Credit: Freepik
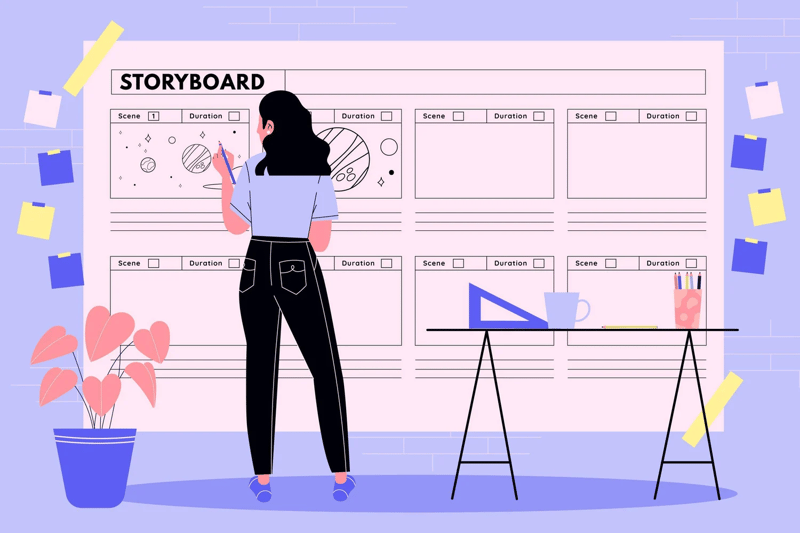
Once you have made up your mind and are like, 'Yes, this is what I want the script to be,' start storyboarding.
It will help you pre-visualize what the animation will be like.
Each scene is sketched out by a storyboard artist, showing what the characters do, how the shots are set up, the order of actions, and the overall cinematic vibe.
Check out this video on how storyboarding is done for commercials; it's quite similar to the process for 3D animation videos.
It's like a blueprint that guides the whole animation video production process.
Picture Credits: AIBEN
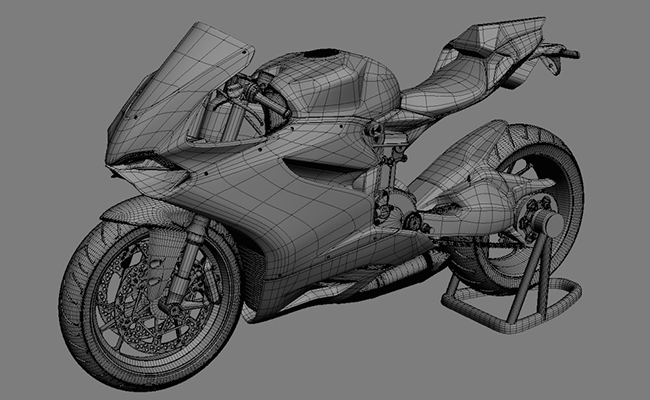
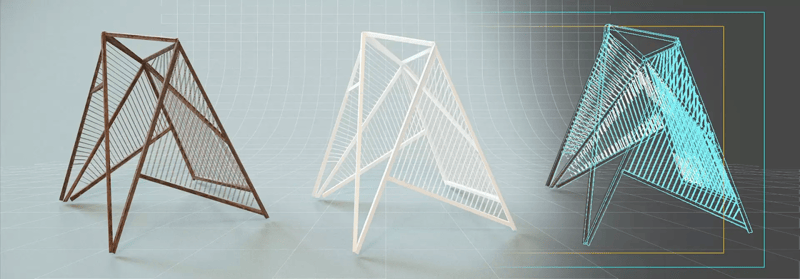
In this step, you build objects and characters using mathematical representations of their elements.
Basic shapes like cubes, spheres, or planes are created with vertices—they are points in virtual space.
This is done to form a mesh in software programs like Autodesk Maya, Z-Brush, and Blender.
These points are placed on a 3D grid and turned into 3D objects.
For a animated marketing video, this is the stage where you form product models, logos, or characters that represent your brand.
Picture Credit: Adobe
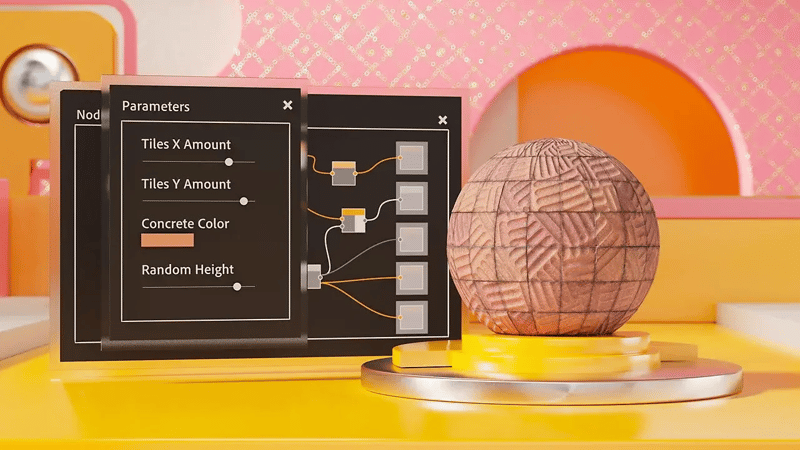
After creating the 3D object, it goes through texturing, which is like giving it an outer layer or finish.
This could involve adding skin, clothing, or hair to a character.
It could also entail adding a metal finish to a car or machine, bricks to a house, or fur to an animal.
In a studio, there are special teams of texture artists who work on this part of the process.
Picture Credit: AAA GAME ART STUDIO
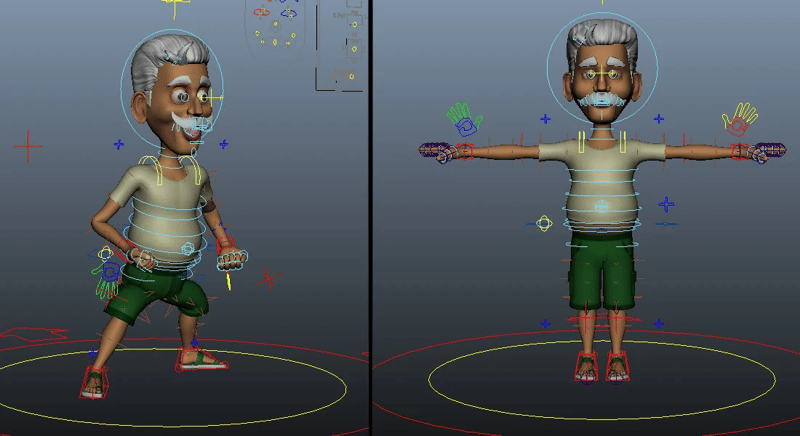
Rigging is like building the muscles and bones for your animation.
Character rigs are what make the joints and moving parts of an object.
They allow your characters and elements to move realistically.
Here’s a quick tutorial on how to do 3D animation rigging in Autodesk Maya to give you an idea.
Riggers are the ones who create these working skeletons for 3D animations.
Next is skinning, which smooths out the joints.
You can think of it as providing the outer layer that covers the mechanics of the object underneath.

Picture Credit: Freepik
This is when the complete storyboard is animated to bring the script to life.
After you have created your 3D character or object from the beginning, the next step is to make them move in a series of actions or in a scene.
Animators manipulate them frame by frame or use methods like setting objects on spines or importing motion capture data.
Character animation focuses on three things— timing, fluidity, and expressiveness.
On the other hand, product animation prioritizes precision and technical accuracy.
Animation software is used to compose movements and expressions in scenes with keyframes or poses defined by the animator.
Picture Credits: KitBash3D
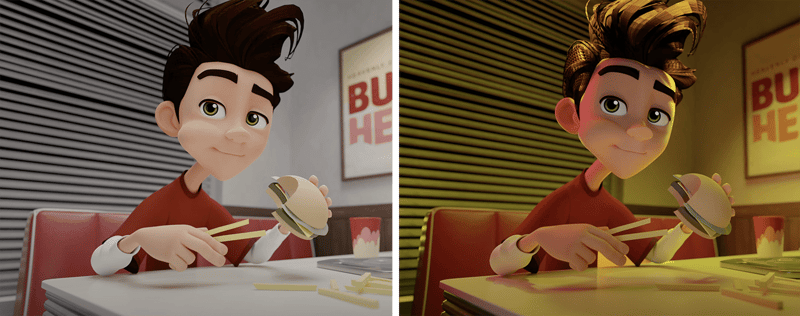
Lighting is crucial to create realism, and if it’s not used properly, objects will appear what they are not and the entire scene can go down the drain.
Good lighting is essential for marketing 3D videos also.
It can set the mood, make the 3D model look better, and provide important information to the viewers.
Here’s a video campaign from Airbnb where you can see different types of lighting being used to depict different times of the day.
If you have skillfully used lighting, it can make any scene more convincing.
If you want to, it can make a scene look just like real life.
Lighting controls shadows and highlights, while cameras capture specific views.
Visual effects like glows, fire, fog, and lens flares can also be included as needed.
Picture Credit: Freepik
In 3D, cameras are incredibly versatile tools without the limitations of the physical world.
You can use them to create scenes with impossible perspectives, like exploring inside a human body's blood vessels or the internal functioning of a product.
Suppose you are making a 3D animation video to promote a new skincare line.
Through adept camera settings, this animation can vividly portray the absorption of the cream into the skin, and its transformative effects on internal cells.
These are details that are challenging to convey through conventional video methods.
Watch these 3D product animation videos to see how they use various camera settings to create impossible perspectives.
The best part is that for all these, you don’t require a lens, focusing controls, aperture, film, etc. It’s all done using software.
In 3D, you can create a single or even multiple cameras. You can then position them as desired in 3D space.
Using the software settings you can mimic their focal length, depth of field, and the like.
These software cameras have no restrictions in terms of size or weight. You can move them to any location and even inside the tiniest objects.
You can animate cameras to perform multiple actions simultaneously, like zooming in while adjusting the depth of field.
When you create a camera in 3D, you choose a view and assign it to the camera, so you see the scene from the camera's perspective.
Picture Credit: FrontSigns
It is the final step in the 3D production pipeline where all the elements like sets, colors, and character movements are transformed into a single film frame.
It is a very crucial step for creating the actual visual output.
It involves calculating individual pixels for each frame using models, materials, lighting, and effects.
Different rendering methods yield different looks.
They can range from photorealistic to cartoonish—choose what’s best for your project or marketing campaign.
To get a good render, things like camera angles, lighting effects, shadows, reflections, and special effects need to be managed properly.
Additionally, rendering is quite a time-consuming and CPU-intensive step.
For example, if each frame of a 60-second DVD animation takes 15 seconds to render, the entire animation (which has 1,800 frames at 30 frames per second) will take more than 7 hours to render.
To avoid such situations and ensure smoother, faster processing of heavy rendering workloads, consider specialized GPU Hosting solutions.
Picture Credits: MAAC Girish Park
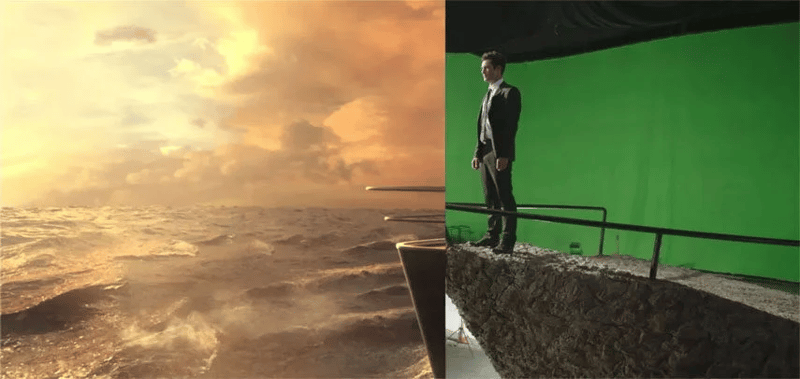
The renders are imported into compositing software to edit, enhance, and add special effects.
Compositing covers a wide range—from adding effects like explosions and transformations to creating environments like buildings or entire worlds.
It is the last step in the visual effects pipeline and also involves replacing blue or green screens with digital or external footage.
Transforming live footage into computer-generated imagery (CGI) is also part of compositing.
Visual effects are added in a similar fashion to compositing. They include illusions and tricks that enhance scenes and characters.
These effects are rendered separately and then a compositing program is used to layer them onto the animation.

Picture Credit: Freepik
Without music and other sound effects, who’ll just watch a silent 3D animation?
Well, I won’t.
Music and foley provide an animation with the much-needed depth and boost in audio.
To set the right mood for the animation, a music composer creates music soundtracks and accompaniment music inside the sound studio.
A foley artist on the other hand creates sound effects.
He/she uses different kinds of shoes and lots of props– car fenders, plates, glasses, chairs, etc. for this job.
A Foley artist creates or replaces original sounds completely or augments existing sounds to create a richer track.
Even the sound of the footsteps you hear in a classic thriller is made by a foley artist in a studio.
Once all these audio elements get the green light, they are edited and mixed to sync perfectly with the action.
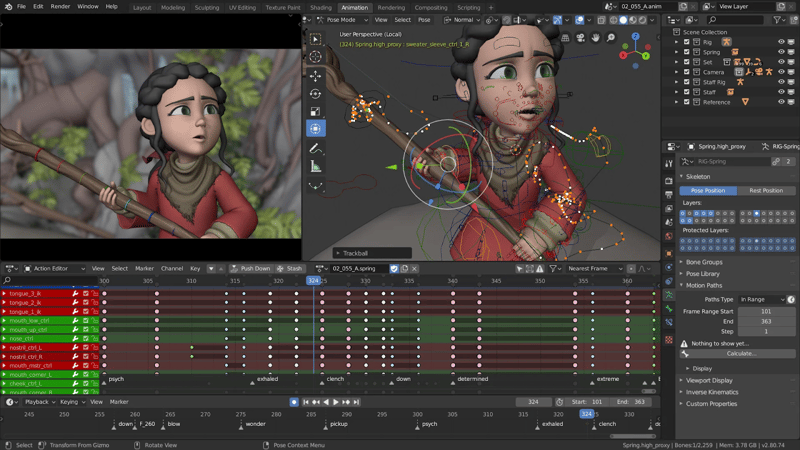
Picture Credits: Blender
The animation in this stage undergoes editing to adjust sequences, cut scenes, and finalize sound.
After all elements are animated, rendered, and refined, the final render is produced.
Finally, with some finishing touches here and there, the render button is pressed, completing the animation workflow.
And that’s how to create a 3D animation video!
By understanding and executing these steps, individuals can bring their creative projects to life, and businesses can produce compelling 3D animated videos that align with their marketing campaigns.
Want custom 3D animation for your business marketing?
Broadcast2World offers custom 3D animation services tailored for your marketing needs.
The steps we discussed earlier primarily focus on how to make 3D animation videos on a large scale.
If you're keen on making your own small animation, you can manage a scaled-down version of this process.
Start with conceptualizing your characters and story.
Make short scenes and use visuals, sound, and characters to tell your story well.
There are different 3D animation tools, like Maya, that you can use.
You can also start learning on your own.
It might be challenging at first, but as you practice, you'll get better at making cooler things.
Who knows, someday you might be producing photorealistic 3D animations for advertising.
Well, that’s a question. When you are just getting started, it gets hard to figure out which 3D animation software applications can do the job for you — that’s something you’ll learn down the line with experience.
But you need to start somewhere, right?
So, here we have compiled a list of the best software options for creating 3D animation videos for beginners:
Autodesk Maya is a 3D animation software that does anything and everything related to 3D animation.
It is basically the industry standard for core 3D animation tasks like modeling, simulation, and rendering.
What it’s known for is–its customizable user interface and advanced CG compositing program called "MatchMover".
It offers a comprehensive set of tools for modeling, animating, texturing, rigging, lighting, and rendering.
Its non-destructive and non-linear workflow allows users to create highly realistic images and animations.
Maya is also capable of modeling complex objects like hair, fur, particles, and clothing.
Features:
Pricing Plans:
If you're a beginner looking for free 3D animation software, you'll probably love Blender.
It is one of the best software for 3D animation videos for beginners
This open-source application supports the entire 3D pipeline, including modeling, rigging, animation, simulation, rendering, compositing, and motion tracking.
Blender also supports 2D animation, VFX, gaming, and video editing.
It is cross-platform. So, you can use it efficiently on Windows, Mac, Linux, and even FreeBSD.
Its OpenGL interface ensures a consistent user experience.
As this is an open-source software, anyone can modify the code to add features, fix bugs, and improve usability.
Features:
Pricing Plans:
This tool is completely free to use.
And it says on Blender’s official website too:
“You are free to use Blender for any purpose. You can distribute Blender, study how it works, modify it, and share your modified versions”
Though Blender is free, users can donate and help support and advance the Blender community.
Check out our detailed blog on 2D vs 3D animations to better understand the differences and what you get with 3D videos.
Autodesk 3ds Max is a powerful 3D modeling, rendering, and animation software.
It brings your creativity to life and helps you build immersive worlds, design detailed 3D animation cartoon characters, or craft intricate props.
It offers intuitive tools for modeling, texturing, and shading, giving you full artistic control to create high-quality renders and stunning visuals.
This 3D animation maker software is an essential tool for game development, architectural visualization, and professional-grade animations.
Features:
Pricing Plans:
KeyShot is a 3D rendering tool that lets you animate visuals of your 3D models in real time.
What I found best about this 3D animation maker software is that it lets you quickly apply materials and light scenes using scientifically accurate materials and real-world lighting effects.
KeyShot also offers advanced features to create incredibly realistic characters, objects, and scenes.
Despite its advanced capabilities, KeyShot is user-friendly with a simple, workflow-based interface.
All in all, it's an easy-to-learn 3D animation video maker software that is powerful enough for experienced 3D rendering professionals.
Features:
Pricing Plans: Monthly: $99.00/month ($1188.00/year)
Houdini Apprentice is a free version of Houdini FX, designed for students, hobbyists, and artists working on personal or non-commercial projects.
It is one of the best 3D animation maker online tools, allowing you to work from home at no cost while integrating smoothly with Houdini Education, another animation software for schools.
The ".hipnc" file format of Houdini Apprentice makes it easy to collaborate across different Houdini FX versions.
While Houdini Apprentice includes all the features of Houdini FX, there are certain limitations due to its free status.
Its downside is that it cannot be used on a network since it's tied to the individual machine.
Another fallback is that features like the License Administrator are not available for use with this software.
Features:
Pricing Plans: Free
After Effects is Adobe's software for creating motion graphics, compositing, and visual effects.
It's widely used in movies, video games, and television production for tasks like keying, tracking, compositing, and animation.
The software offers numerous special effects to manipulate images in various ways.
With After Effects, you can merge layers of video and images to craft stunning visual effects.
Additionally, its best part is that it functions as a basic non-linear editor, audio editor, and media transcoder.
After Effects integrates seamlessly with other software applications.
It can import 3D scene data to produce Hollywood-level title sequences.
Features:
Pricing Plans:
Toon Boom Harmony is a versatile animation and production software that helps you create animations for various purposes like short films, TV shows, video games, or online content.
It offers different animation techniques like cutout, paperless, and traditional animation.
It handles tasks from scanning to compositing and even 2D-3D integration.
Its tools include pencil lines, textures, deformation tools, morphing tools, inverse kinematics, and a built-in compositor.
In addition to the software, Toon Boom provides a centralized server for sharing, managing, and storing assets in a central database, which can be accessed within a studio or across multiple studios.
Features:
Plans and Pricing:
SketchUp is a 3D modeling software that is web-based and is quite ideal for moviemakers, engineers, and architects.
It's versatile and can be used for various 3D modeling tasks such as gaming, interior design, civil and mechanical engineering, and more.
The program includes drawing layout tools, and surface rendering capabilities and supports third-party plugins to extend its functionality.
One of SketchUp's standout features is its 3D warehouse.
So what this warehouse does is–offer a library of free model assemblies.
Users can use these models in their projects or contribute their own models to the library.
What’s great is that all models in the 3D warehouse are freely available for anyone to use.
Indeed, AI can be used to create 3D animations, and that too in various ways.
With how far AI-generated videos have come, it will be a tough pill to swallow if AI doesn’t help one 3D animate.
But thankfully, it does help in generating 3D models, animating 3D objects, and rendering the 3D scenes for your animation.
Additionally, it can also be quite useful for automating laborious tasks such as rigging and texturing.
Ultimately, the biggest advantage of using AI is that it helps the 3D animators make more intricate animations faster and with reduced manual intervention.
As AI becomes more deeply integrated into animation pipelines that rely on large datasets and automated tools, features such as AI threat detection play an important role in safeguarding creative assets, training data, and production workflows.
AI can help spot patterns in data and create animations that look very real. It can also make 3D scenes look more lifelike by generating natural lighting and materials.
If you are interested in learning about more free animation video maker software we have also covered another blog on it.
Now you are clear on how to make a 3D animation video, so the next question bugging you must be around the time taken to do such projects.
Creating a 3D animation can take anywhere from a few days to several years.
Surprised? Let me explain why.
The time needed basically depends on the project's complexity, the detail required, the animator's skill, and the tools used.
Simple animations take days, while complex ones take weeks or months.
And feature-length movies can even take years.
With practice, animators can complete future projects faster.
To give you a rough estimate on 3D animation-making time, let's break down how long it takes to create a 60-second 3D animation video.
Ready? Here we go-
And voilà! You've got a 60-second animation. It's a lot of work, but also a lot of fun!
The cost of creating a 3D animation can vary widely depending on several factors.
If you're doing it yourself, you'll need to consider your time, the cost of animation software (ranging from free to $1200/year), hiring voiceover actors ($50-$500), and licensing stock music ($9-$399).
If you hire an animation studio, the 3D animation cost will depend on the length and complexity of the animation, the animator's skill level, and the software being used.
Basic animations might cost a few hundred dollars, while high-quality, professional 3D animations can range from thousands to hundreds of thousands of dollars.
In the animation industry, the average cost for 3D animation is around $10,000 per minute, but this can vary:
High-end examples like "Frozen" and "Toy Story 3" had massive budgets of $24,000 per second and $32,000 per second, respectively, highlighting the investment in technology and talent needed for top-quality animations.
However, most 3D animation projects are far more affordable.
Investing in the right tools, talent, and expertise can save you time and money.
Well, that was a long journey through the world of 3D animation, right?
From learning how to make 3D animation video to diving into the details of software options, costs, and time consumption, you've seen it all in this 3D animation tutorial blog.
Now that you've armed yourself with knowledge about the whole process of 3D animation video production, it’s time to go ahead and unleash your creativity.
Craft those compelling stories, bring those crazy characters to life, and build that never-thought-before enchanting animated world.
No matter how crazy the story sounds— give it a CHANCE.
Take those baby steps and embark on your 3D animation journey.
Who knows, you might end up creating the next ‘Toy Story’ or a groundbreaking marketing sensation!
Broadcast2World is an animated video agency that specializes in 3D video animation services.
You may request a free price quotation today!
Comments (2)